This is an old revision of the document!
Integration Tab
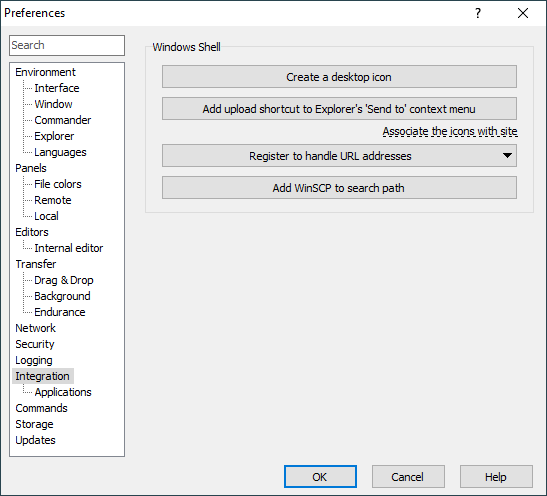
Integration tab allows user to configure how WinSCP integrates with Windows.
Advertisement
Shell Icons
Use Create a desktop icon button to create shortcut icon that starts WinSCP on your desktop. You will have an option to create the icon for all users of your computer (requires administrator priviledges) or for yourself only.
To create desktop icon that directly opens selected stored session use Shell icon button on Stored Sessions tab of Login dialog.
Use Create a Quick Launch icon button to create shortcut icon to start WinSCP on Quick Launch toolbar on Windows taskbar.
Use Add upload shortcut to Explorer’s ‘Send to’ context menu button to create shortcut icon in 'Send To’ menu in file context menu of Windows Explorer.
To create ‘Send To’ icon that directly opens selected stored session use Shell icon button on Stored Sessions tab of Login dialog.
Use Register to handle sftp:// and scp:// addresses button to register WinSCP to handle sftp: and scp: URL addresses.
Use Add WinSCP to search path to add WinSCP installation directory to system search path.
External Applications
Using PuTTY path box you can specify path to PuTTY application that is used in Open in PuTTY function. You can use environment variables in the path, with syntax %NAME%.
Check Remember session password and pass it to PuTTY checkbox to make WinSCP keep session password in memory and pass it to PuTTY when using Open in PuTTY function (using command-line parameter -pw). However better approach would be to use public key authentication together with Pageant.
Advertisement
Check Automatically open new sessions in PuTTY to automatically send all sessions opened in WinSCP also to PuTTY.
