This is an old revision of the document!
Managing Sessions
The Login dialog shown on startup lets you open the first session. But with WinSCP you can have several sessions opened at once or close the first session and reuse the window for another.
Advertisement
Opening Additional Sessions
Once you have opened your first session and the main window shows up, you can open additional sessions using Tabs > New Tab [> Remote Tab] or the corresponding toolbar button or keyboard shortcut. The Login dialog will show. There you can choose some of your sites or enter the login details manually. To directly open a site, go to Tabs > Sites.
The newly opened session will become active.
You can use WinSCP jump list to reopen recent sessions too.
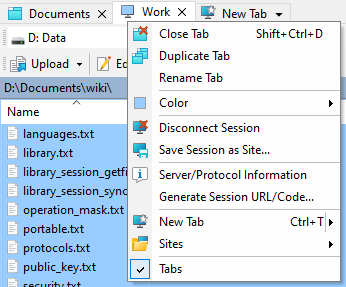
Closing Session
To disconnect a connection, while keeping the connection tab open, go to Tabs > Disconnect Session. To close the session tab, go to Tabs > Close Tab or close the tab itself.
When the last connection is closed, Login dialog shows automatically, by default. You can turn that off in preferences.
You can also have session disconnected automatically once an operation finishes.
Saving Opened Session
If you have opened ad hoc session, but then you decide that you want it in site list, you can use command Tabs > Save Session as Site.
Even if the site you are connected to is already stored in the site list, you can use the command to change the site’s initial state (such as directories, synchronized browsing state and session color) to current ones.
Session Color
If you like, you can associate color with each session. The color will influence file panels, tab, site item in site list and well as initial color of associated internal editors. You can associate the color with site on Advanced Site Settings dialog. To change color of already opened session go to Tabs > Color.
Advertisement