This is an old revision of the document!
Installation
This article contains detailed description of downloading and installing WinSCP. You may want to see simplified guide to the process instead.
You can use WinSCP executable as a portable application with its settings stored in an INI file and no installation required. This configuration is best for using WinSCP from removable media. If possible, you should complete a full installation.
- Obtaining WinSCP
- Running the WinSCP Installation Program
- Upgrading WinSCP
- Downgrading WinSCP
- Removing / Uninstalling WinSCP
- Automating Installation and Uninstallation
- Custom Distribution of WinSCP
- Administration Tasks
Advertisement
Obtaining WinSCP
You can obtain WinSCP from the WinSCP download page. You should save the installer to an easily accessible location such as your Microsoft Windows desktop or your My Documents folder.
Running the WinSCP Installation Program
- If you have WinSCP running, close it. The installer will not run if it finds any instance of WinSCP running.
- Open the installation program by double clicking on its icon.
- Select the installation language. Your selection will also affect which language plugin will be selected by default for the installation. While you can change the language, the icons the installer creates will remain in the language selected for installation. Note that some beta releases are packaged with English language only, so you will not have a chance to choose a language.
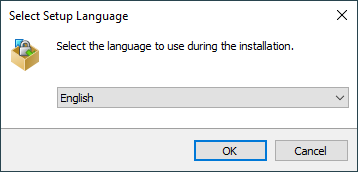
Only complete translations are distributed in package form. Incomplete translations must be downloaded separately. - A Welcome Screen is shown at the beginning of setup procedure. To continue, click Next.
- Review the section License Agreement and then click Next. You can access WinSCP License and WinSCP Privacy Policy anytime later on this site.
- You will be prompted to select a setup type, with following options:
- Typical installation
- Installs to default destination (typically
C:\Program Files (x86)\WinSCPon 64-bit system andC:\Program Files\WinSCPon 32-bit system). - Installs all components (but only selected language, to install all languages use Custom installation).
- Performs most typical setup tasks:
- If you select Typical installation you can skip to step 11.
- Installs to default destination (typically
- Custom installation
- Allows full selection of destination, components, and features. See steps 7 through 10.
- Typical installation
- You will be prompted for a Destination. Normally the default provided will be acceptable. Change the Destination folder if you like, and then click Next to proceed.
- After selecting the destination folder, the Component Selection screen should appear. You should keep all components selected, however, if you do not intend to use some of the optional components, you may select another option here.
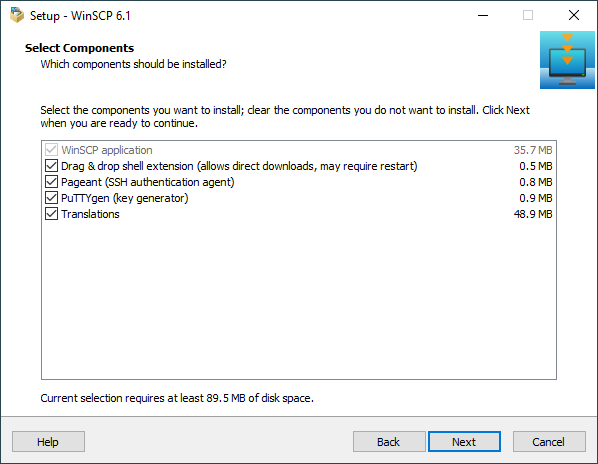
You can select to install the following components:- WinSCP application (mandatory)
- Drag&drop shell extension (may require restart)
- Pageant (SSH authentication agent)
- PuTTYgen (key generator)
- Translations (if available in current release)
- After selecting components, you will be prompted for a Start Menu Folder. You may change this from the default of “WinSCP”, leave it as is, or click the Don’t Create a Start Menu Folder check box. The start menu folder will include icons for all installed applications and links to important webpages about WinSCP. When you are satisfied with your selection click Next to proceed.
- After selecting a Start Menu Folder, you will be prompted for Additional Installation Tasks. You can also perform most of these tasks later, after installation (follow each task for details).
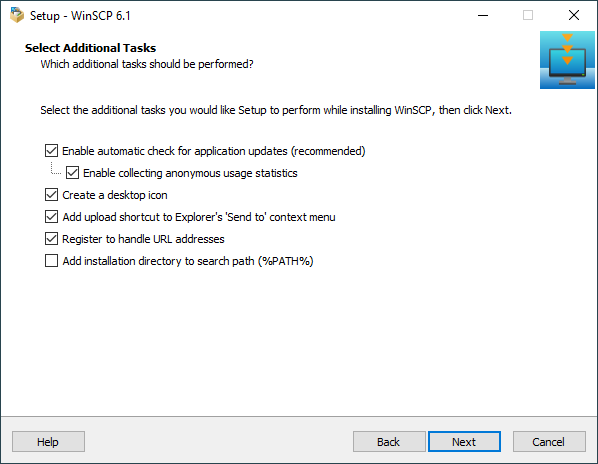
You can select from following tasks:- Enable automatic check for application updates (recommended)
- Enable collecting anonymous usage statistics
- Create a desktop icon (for current or all users)
- Create a Quick Launch icon (for current user only, available in Windows Vista and older only) &winxp &winvista
- Add upload shortcut to Windows Explorer’s ‘Send to’ context menu
- Register to handle URL addresses
- Add installation directory to search path (%PATH%) (administrators only)
- After the Additional Installation Tasks screen, you will be prompted for Initial User Settings. Again, these can be easily changed later.
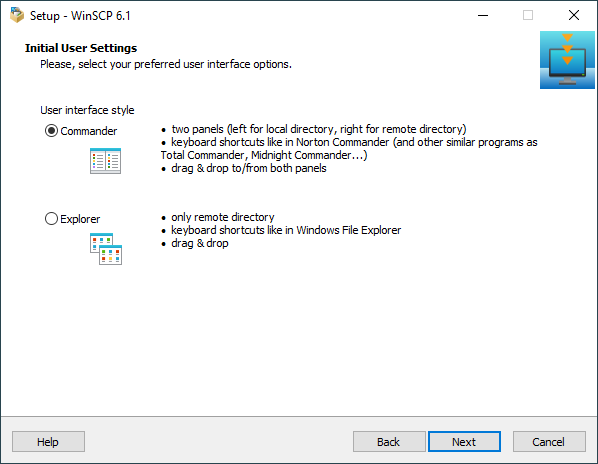
- After you select the interface, a third party software recommendation screen may open. Review offered software and choose if you want to download and install this offer or not. Note that before deciding to install any third party application, you are required to agree to its separate and independent Terms of use and Privacy policy.
- After you review the recommendation, the Ready to Install screen opens. On this screen, you can review the installation options you’ve selected. If you want to make changes, click Back until you return to the appropriate screen. If you do not want to make changes, click Install to start the installation.
- A brief installation process will take place.
- If you selected certain features such as drag&drop integration, installer may need to restart Windows Explorer, to make the features operational. If you choose not to restart, some WinSCP functions may not be available until you do so.
- If you are using PuTTY or FileZilla clients, installer may offer you to import their sites into WinSCP.


Advertisement
Upgrading WinSCP
To upgrade WinSCP, download the newer version, and then install it. The installation will preserve your configuration, and – if necessary – upgrade it.
The new WinSCP version will be installed in your language, if this particular localization has already been completed. The installation package contains all the translations that were complete at the time of its release. Otherwise you must install the new translation manually, if available. Any translation from your previous WinSCP version will not work with the new version.
When upgrading Portable executable, just replace the executable files with the new version. New version can always read configuration from the old version.
To check for rare backward incompatible changes between versions, search version history for “Change:”. When upgrading from a version more than a year old, do not forget to search also old version history.
Downgrading WinSCP
In most cases, you may downgrade in the same way as upgrade (i.e. install the old version over the newer one). However safe way is to uninstall the newer version (while keeping your configuration) and only then install the old version.
Note that some of your configurations may be lost when downgrading. To make sure that you will be able to downgrade, you should backup your configuration before the upgrade.
Removing / Uninstalling WinSCP
To remove WinSCP, go to Control Panel > Programs > Uninstall a program. &winvista
During the removal, WinSCP will ask if you want to remove WinSCP configuration and other data stored on your computer.
Automating Installation and Uninstallation
WinSCP uses Inno Setup as installer. It lets you use optional command-line parameters to automate the installation.
You can use following parameters to automate the installation:
/SILENT- Runs the installer without any prompts (with the exception of error messages, etc.). Default selections are used for destination folder, components, etc./VERYSILENT- As/SILENT, but without showing the progress window./NORESTART- Instructs installer not to reboot even if it’s necessary./LOG="filename"- Causes Setup to create a log file./LOADINF="filename"- Instructs Setup to load the settings from the specified file after having checked the command line. This file can be prepared using the/SAVEINFparameter./SAVEINF="filename"- Instructs Setup to save installation settings to the specified file.
See full list of InnoSetup setup command line parameters.
WinSCP uninstaller (unins000.exe in WinSCP installation directory) has the same parameters as above (except for /LOADINF and /SAVEINF).
See full list of InnoSetup uninstaller command line parameters. When running uninstaller silently, configuration and other data stored on your computer are not removed.
Advertisement
Custom Distribution of WinSCP
Learn how to create a custom distribution of WinSCP.
Administration Tasks
Learn how a system administrator can restrict or enforce certain functionality of the application.