Uploading Files
This article contains detailed description of uploading files. You may want to see simplified guide to the process instead.
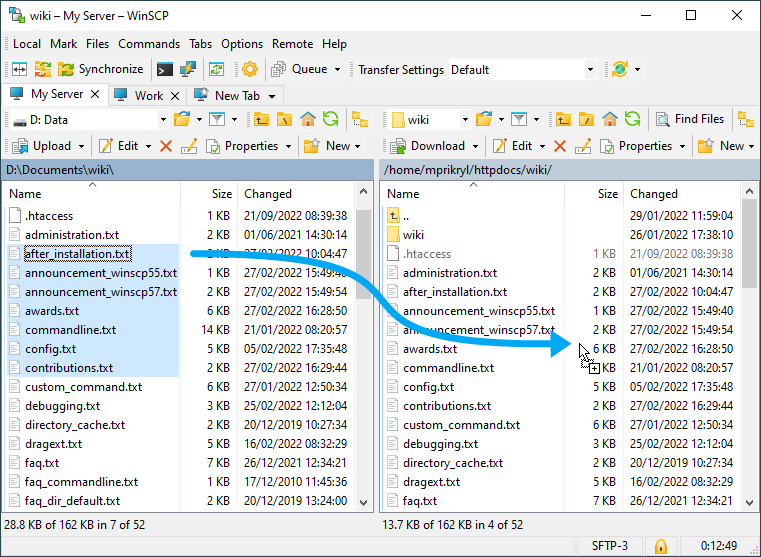
The simplest way to upload files is to drag them from local panel or Windows File Explorer to remote panel of WinSCP. See section Using Drag&drop (Mouse).
For alternative ways, advanced options and automation see further sections.
Advertisement
- Using Drag&drop (Mouse)
- Using Keyboard
- Using Copy&paste
- Using Windows File Explorer’s ‘Send To’ Context Menu
- Dropping Files on WinSCP Icon
- Dropping Files on Session Tab
- File Upload in Background
- Preserving Overwritten Remote Files
- Automating Uploads
Using Drag&drop (Mouse)
First select the local files or directories you want to upload. You can select the files in the Windows File Explorer or other application. If you are using Commander interface, you can also select the files in its local panel.
Then drag your selection and drop it on the remote panel. If you drop the files on empty place on file list, the files will be uploaded to current remote directory.1 If you drop the files on remote directory icon (either in the file list or directory tree), the files will be uploaded to that directory.
Advertisement
Before the upload actually starts, the transfer options dialog will show. There you will have a chance to change the transfer options or the target directory. You can avoid the dialog being shown in preferences. In such case you can change the transfer options by selecting preset on Transfer Settings toolbar.
If you hold Shift key while dragging the files, they will be moved to remote directory (i.e. transferred and deleted from local directory).
You can also drop files to session tab to upload them using non-active session.
Using Keyboard
If you prefer controlling application using keyboard, you will probably find Commander interface useful. Otherwise, you must use copy&paste method.
First select the local files or directories you want to upload (learn how to select files using keyboard). Make sure that local panel is still active and use command Files > Upload or press F5 key.
Before the upload actually starts, the transfer options dialog will show. There you will have a chance to change the transfer options or the target directory. The target directory is by default the current remote directory. You can avoid the dialog being shown in preferences. In such case you can change the transfer options by selecting preset on Transfer Settings toolbar.
If you use Files > Upload > Upload and Delete (or press F6 key), the files will be moved to remote directory (i.e. transferred and deleted from local directory).
Using Copy&paste
If you prefer the Explorer interface, but still want to control it using keyboard, you need to use copy&paste method.
First select the files you want to upload in Windows File Explorer or other application and copy them to clipboard.
Then switch to WinSCP and use command Files > Paste (or Ctrl+V).
Before the upload actually starts, the transfer options dialog will show. There you will have a chance to change the transfer options or the target directory. The target directory is by default the current remote directory. You can disable the dialog in preferences.
Dropping Files on WinSCP Icon
Files dropped on WinSCP icon associated with site will be uploaded.
Dropping Files on Session Tab
To upload files using different session than active one, you can drop the local files to any session tab.
Advertisement
File Upload in Background
By default, the file upload starts in foreground, blocking the WinSCP window until it is complete. Learn how to schedule the background transfer.
Preserving Overwritten Remote Files
You can set up remote recycle bin to backup files that you overwrite during upload.
Automating Uploads
To automate file upload use scripting command put or .NET assembly method Session.PutFiles.
- In Commander interface you may consider turning off Full row select option to be able to drop files everywhere except directory files names to upload them to current remote directory.Back